
aikon Easy Parallax
Boost your web appearance with amazing parallax sections
Boost your web appearance with amazing parallax sections


If you have purchased the extension and for some reason regret it, we offer a 30 day money back guarantee.

Create amazing parallax sections on your website with ease. Select an image, add overlay texts, modules (any module). Insert shaders, set the parallax's ratio, direction, style and many more options. Improve your website appearance with aikon Easy Parallax!





We're sure you've seen this before and got excited, right? Well, now you are able to do this all by yourself. With this super-fast and super-easy module you can get parallax animation sections with absolutely no need for even a single line of code. Pretty cool, huh? Come and try it for yourself!
Finally an easy solution for inserting parallax animations into your Joomla website.
aikon Easy Parallax ('Parallax' henceforth) allows you to display a stylish and beautiful parallax effect which includes both customizable text and a background image. The parallax becomes fully visible as you (and/or your users) scroll down your webpage. It can move in the same or different speed as the rest of the webpage. Newly incorporated features allow you to transcend the limitation of an otherwise normal HTML document, and setting display dimensions in a much more flexible and relevant way then just % or PX.
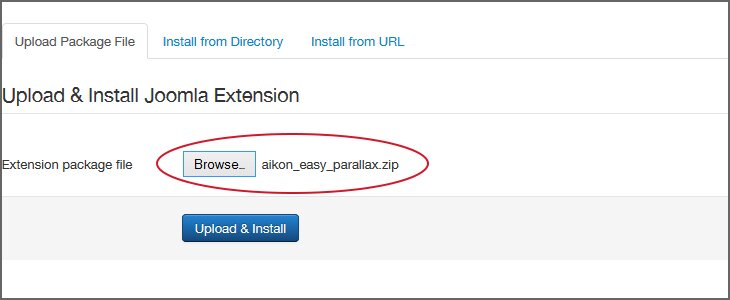
This is a standard Joomla! Module. To install it you will need to log into your admin interface and select the Extension Manager under the 'Extensions' tab in your top menu (assuming you are using a standard admin interface). Once you're inside, click on the 'Upload Package File' tab (it may already be selected for you), and drag the packaged zip file into the 'Browse' button, or click on the 'Browse' button and select it. Finally, click on the 'Upload & Install' button and you're ready to go.
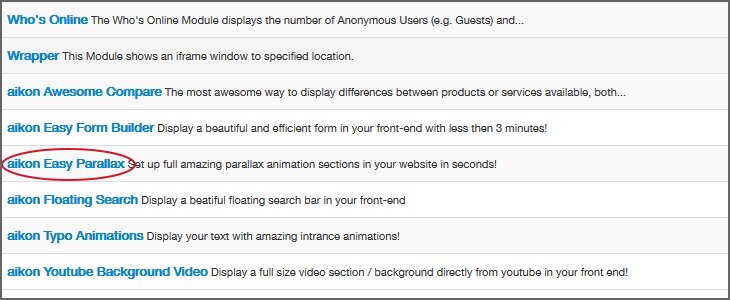
The module will now be available from the Module Manager found under the 'Extensions' tab in the top menu of the admin interface. An initial module will be created for you, and you can create additional modules by clicking on the 'New' button. Select the modules you have already made in order to configure them. Don't forget to publish them in the correct positioning and on the right pages.
Modules can also be included inside an article. If you'd like to do that, here is some info directly from the Joomla! Documentation portal: http://docs.joomla.org/How_do_you_put_a_module_inside_an_article%3F.
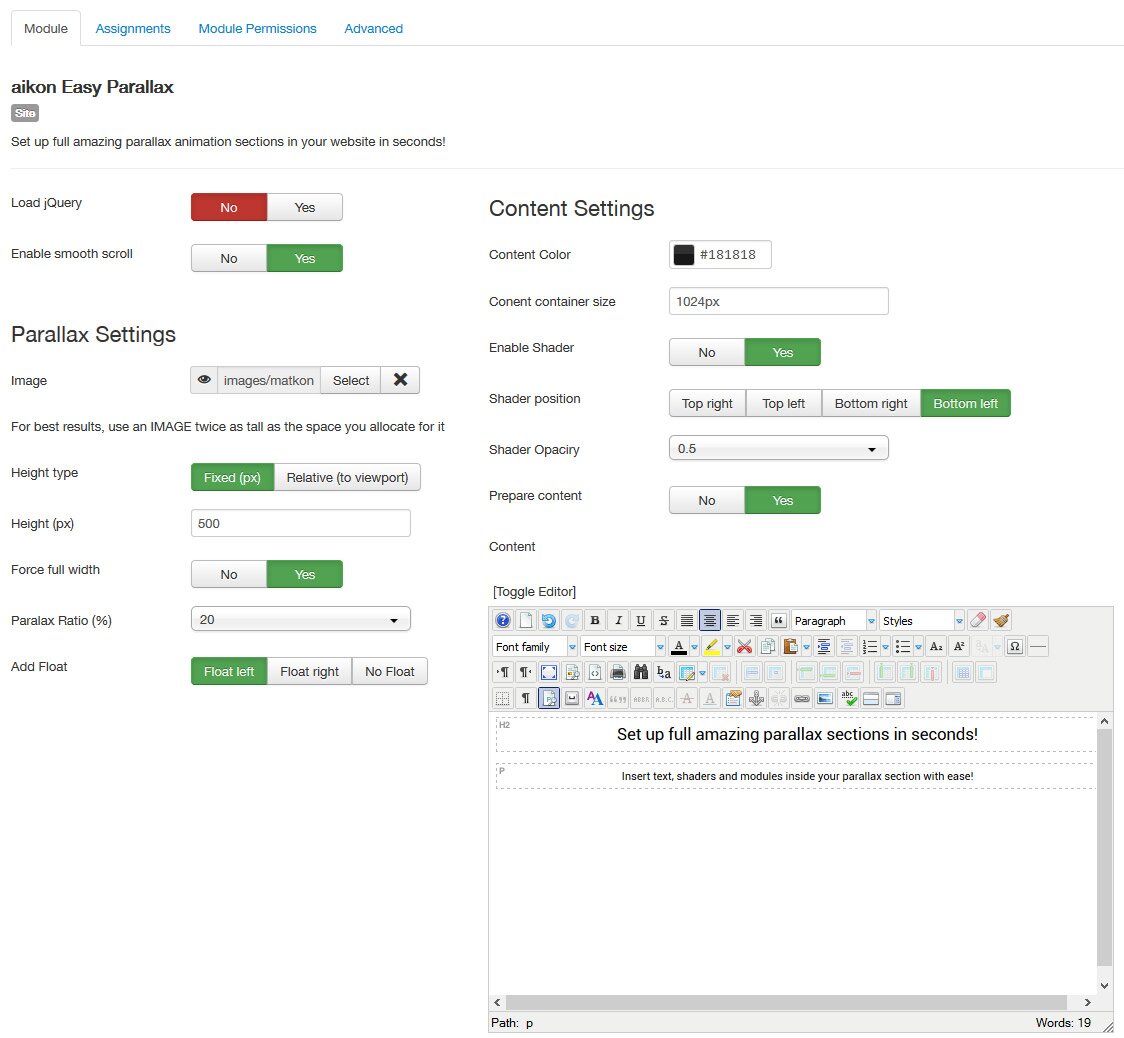
After you have installed and published the module it's time to add to it some content. Enter the module's configuration settings from the Module Manager.
Heads up: Parallax requires jQuery to function. If you are encountering any problems, please make sure the module is published correctly, and then try switching on 'Load jQuery' (click on 'Yes'). This will make the extension load its own jQuery.
We strongly recommend you leave 'Leave Smooth Scroll' on. This will load a short script that forces Google Chrome to scroll smoother, thus allowing your Chrome users to enjoy the parallax effect to its fullest.
Next, it is best if you pay attention to all the fields under 'Parallax Settings', although the default settings may very well suite you.
Firstly, you need to select a background image. It is strongly recommended you pick a large enough image, especially if you decide to set a high parallax ratio (in which case the image must be larger than the parallax display).
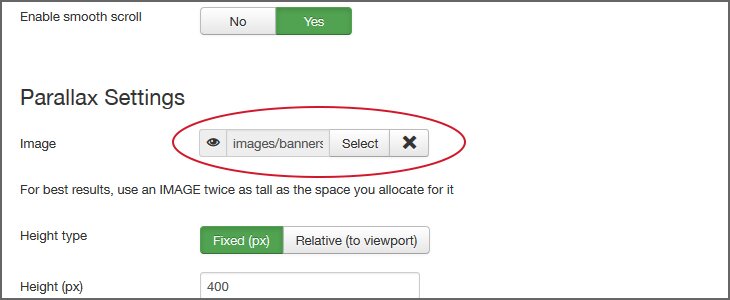
Next, you'll need to select a type of display height. You can either choose a fixed height (in PX) by adding the required value in the field that appears before you, or you can use our new and awesome feature - 'Relative Size'. If you choose this option, a field will appear for you to add a specific size in. This will give the parallax display a specific percentage (according to height), regardless of the use of advanced CSS support found in your users' browsers. For example, by entering 50% in the field, you will receive a parallax that uses exactly 50% of your users' view point.
In response to our users' requests, we have recently added a new feature – 'Force Full Width'. Typically, the parallax display takes the size of its container. But, what if your template doesn't have a full-width slot to place the module in? Well, from now on, that is no longer a problem. Just click on the 'Force Full Width' button and the parallax will have a full-width display that does not break your layout in anyway.
Next, you'll need to select your parallax's ratio. The higher the ratio, the faster the image scrolling will be in relation to the rest of the page. Avoid using 100 unless you want your display to not look like a parallax. You can use this to make an entire one page site from our module, with the 'solid' sections using a parallax with 100% ratio.
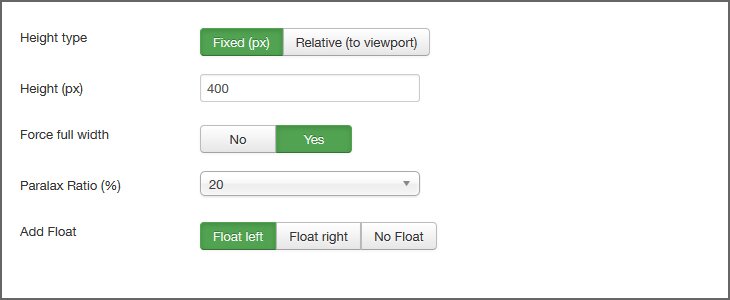
Finally, in the 'Add Float' field you can find helpful advice for dealing with any layout problems you might encounter.
In the 'Basic' tab (under 'Content Settings') you can add content to your parallax display by using the content editor available inside.
The 'Content Color' and 'Content Container Size' fields control their aptly name functions. The 'Content Container' is always centered. If you want the text on a specific side (left/right), just align the text you add to the editor.
By turning 'Enable Shader' on you will reveal the shader's settings. Inside you can set its direction and opacity. We strongly recommend you play around with it until you find the perfect match. It's an awesome feature – we're sure you'll love it!
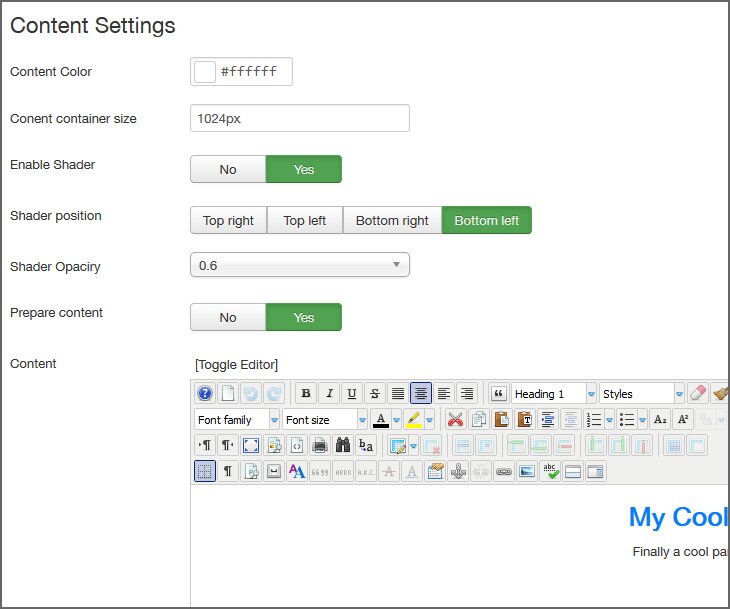
Finally, you can choose whether or not to display the content as it is or to let Joomla! process it first. This will allow you to add additional modules into the display. Just turn 'Prepare Content' on (by swiping on yes). Please note that the name 'Prepare Content' is the name of the internal Joomla! event which triggers all content plugins to work on the content.
If you can't see your new module, we strongly recommend you follow our troubleshooting tips below.
The module may not work for various reasons. These can all be easily resolved.
The most common reasons are improper configuration of general module information or parameters, and/or a jQuery issue.
You should therefore make sure your module's general configurations are valid and fit your intention:
Make sure the module's parameters are valid: aikon form requires correct settings. Check out the rest of the document to make sure everything has been set correctly.
Solving jQuery Issues:
Most extensions require a jQuery plugin. Many of them include added features that enable users to leverage jQuery to the fullest. The only problem is that users often upload jQuery themselves, and by doing so they overwrite the extended version of jQuery, thus preventing the extension from working properly.
The best solution is to make sure only one instance of jQuery is loaded. One way of doing that is to manually check that jQuery is NOT loaded via the form template but by Joomla! only. We also suggest you download a free plugin which can help you handle this issue. It's called jQuery Easy, and it's available here: http://extensions.joomla.org/extensions/core-enhancements/performance/jquery-scripts/18327.
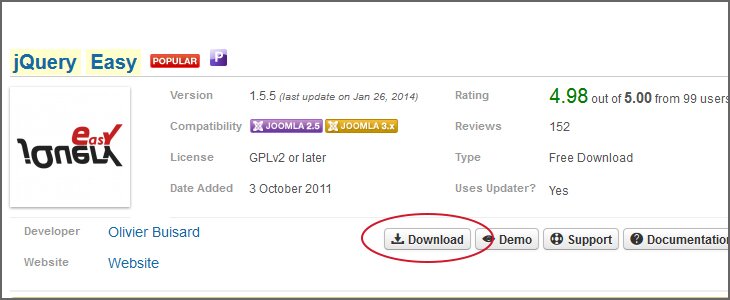
Pease notice: we are NOT responsible for any damage that may be caused by using the jQuery Easy plugin. The plugin needs to installed, enabled and configured manually.
The recommended settings for this plugin are: under the 'Basic Site Options' select 'Enable jQuery field jQuery' or 'JQuery+jQuery UI (select one of them, according to your specific needs). Under version select 1.8 and you're ready to go!






 Mobile DetectionWrite ContentsSmooth ScrollOut Of The BoxFull Width / HeightInsert Modules



 2.5 + 3.X
 2.5 + 3.X

 2.5 + 3.X

 2.5 + 3.X
Copyrights © 2014 aikon. All rights reserved. Please read our Terms of Service and Privacy Policy.
aikon CMS is not affiliated with or endorsed by Open Source Matters or the Joomla! Project and / or any other open source projects.
The Joomla! logo is used under a limited license granted by Open Source Matters, the trademark holder in the United States and other countries.

 2.5 + 3.X

