
aikon Easy Form Builder
The most advanced forms building component for Joomla!
The most advanced forms building component for Joomla!


If you have purchased the extension and for some reason regret it, we offer a 30 day money back guarantee.
Using aikon Easy Form Builder you can create every form you have in mind with less than 3 minutes! Use one of our designed-ready themes or, take your time and use are advanced styling options to create a customized form that meets your specific needs. Either way, your form will fit seamlessly into your website without the need of writing any code. When we say simple, we mean it!





Wouldn't it be nice to be able to configure a form that looks amazing, works amazing, saves your contacts right in the component (making sure you don't lose any leads), has AJAX Live Validations, numerous design-ready themes, and even lets you customize its style and colors to adapt perfectly to your website design? Well, that is no longer a mere dream. aikon Easy Form Builder enables you to save valuable time and effort, while maintaining the highest level of product quality.
"After using this component, I could never EVER go back and use another form component again. A truly amazing extension!"
Chris Teeman, Joomla! Developer.
aikon Easy Form Builder allows you to create stylistic simple or complex forms in a matter of minutes. Data collected from each form is submitted via Ajax, and can be sent to your email, and/or saved to your database for later viewing. All forms can be styled according to a specific theme and color scheme. Advanced users can also create alternative form layouts, fields and email layouts, using flexible, easily readable code which is thoroughly documented below.
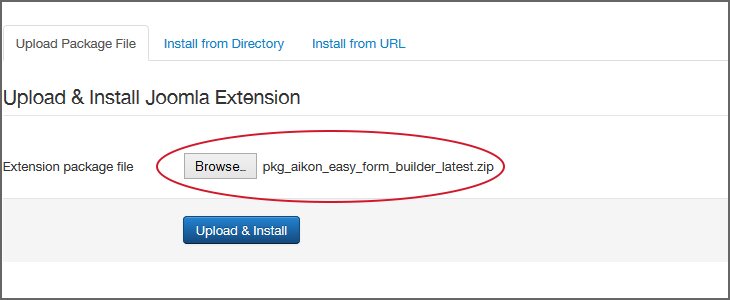
This is a standard Joomla! Module + Component Package. To install it you will need to log into your admin interface and select the Extension Manager under the 'Extensions' tab in your top menu (assuming you are using a standard admin interface). Once you're inside, click on the 'Upload Package File' tab (it may already be selected for you), and drag the packaged zip file into the 'Browse' button, or click on the 'Browse' button and select it. Finally, click on the 'Upload & Install' button and you're ready to go.
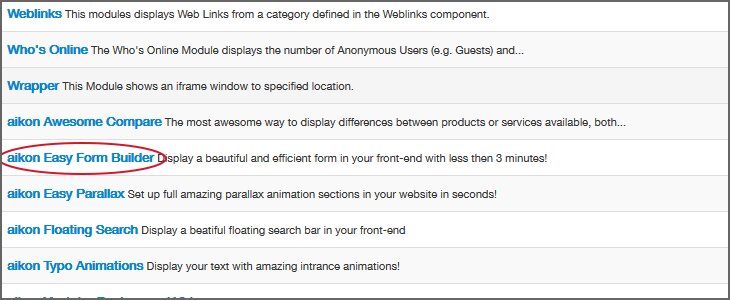
The module will now be available from the Module Manager found under the 'Extensions' tab in the top menu of the admin interface. An initial module will be created for you, and you can create additional modules by clicking on the 'New' button. Select the modules you have already made in order to configure them. Don't forget to publish them in the correct positioning and on the right pages.
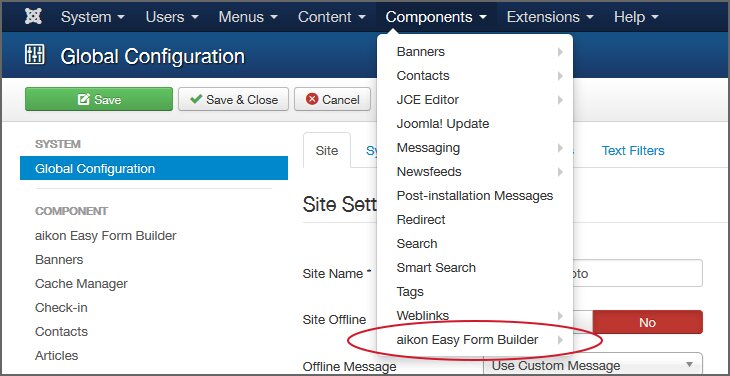
The component will now also become available inside the admin interface. Please note that all actions take place inside the module; the component is just meant to let you see all saved actions.
Modules can also be included inside an article. If you'd like to do that, here is some info directly from the Joomla! Documentation portal: http://docs.joomla.org/How_do_you_put_a_module_inside_an_article%3F.
Overview
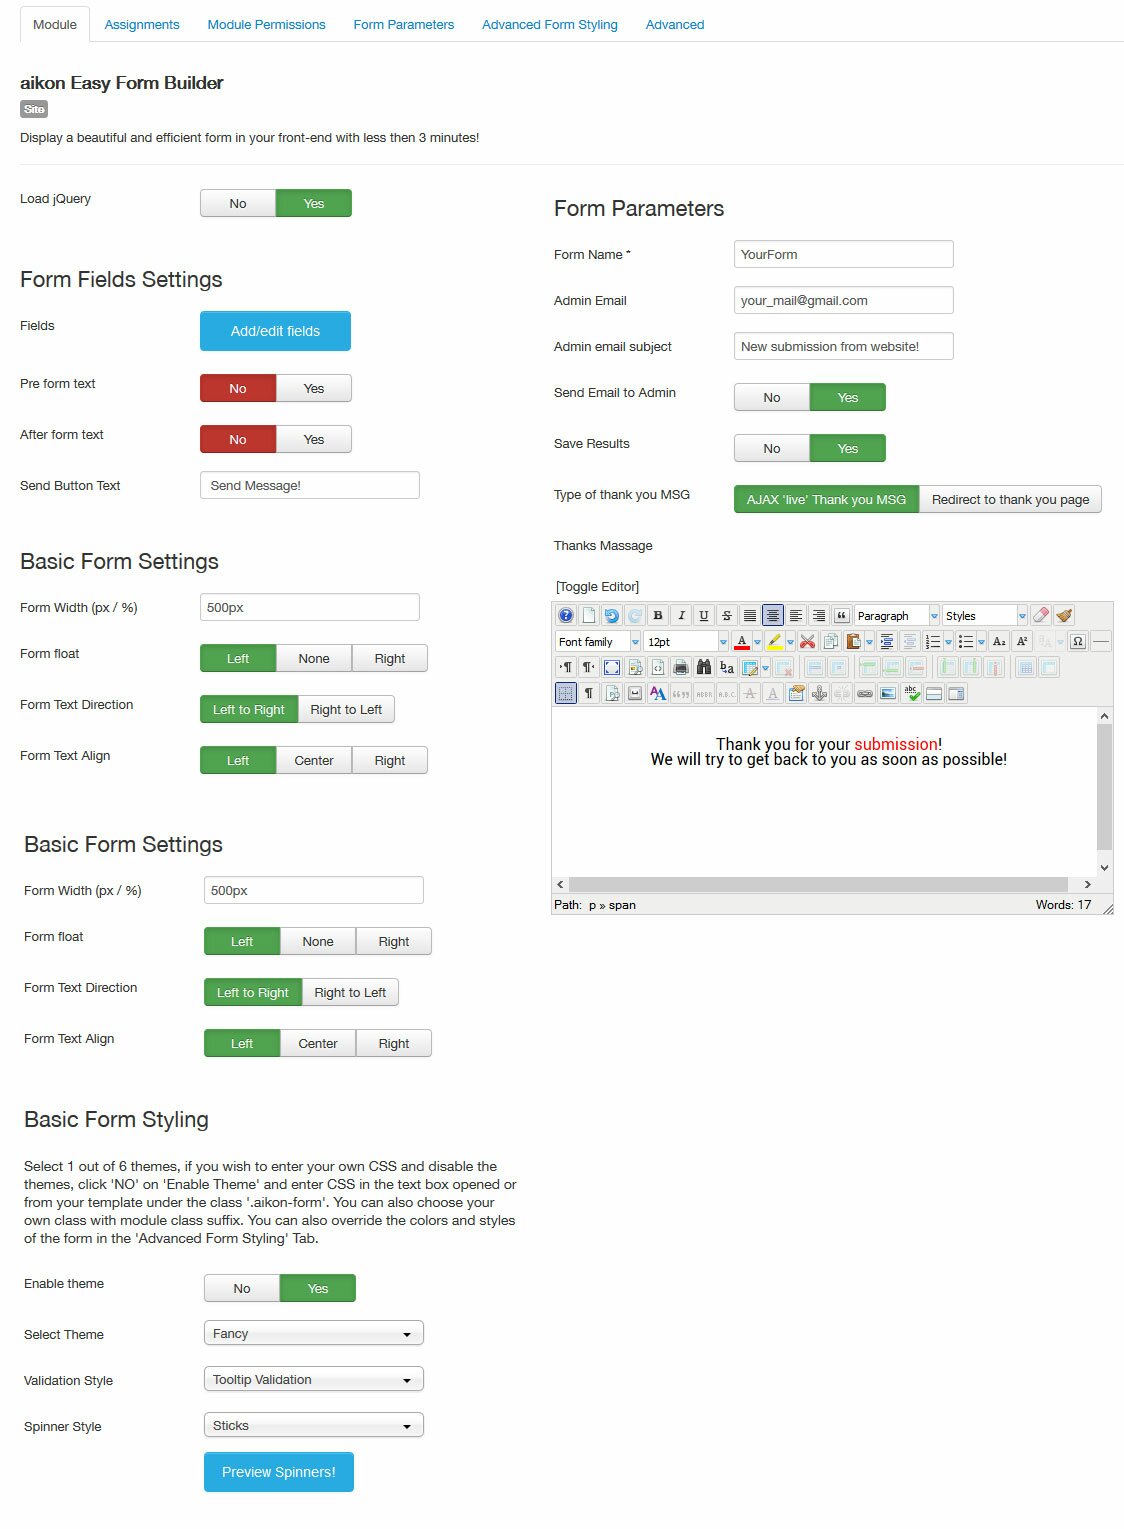
Before starting to configure your aikon Form, we recommend checking out the 'Basic' and 'Form Parameters' tabs. This is, however, not mandatory and, obviously, not relevant for everyone. Inside the 'Basic' tab you can choose to enable jQuery (in cases in which the form is not finishing its submission); set your fields; add content before and after the form; set form dimensions and alignment; set a 'send' button and apply basic styling features (for the form's theme and loading spinner).
Heads up: the module requires jQuery to function. If you are encountering any problems, please make sure the module is published correctly, and then try switching on 'Load jQuery' (click on 'Yes'). This will make the extension load its own jQuery.
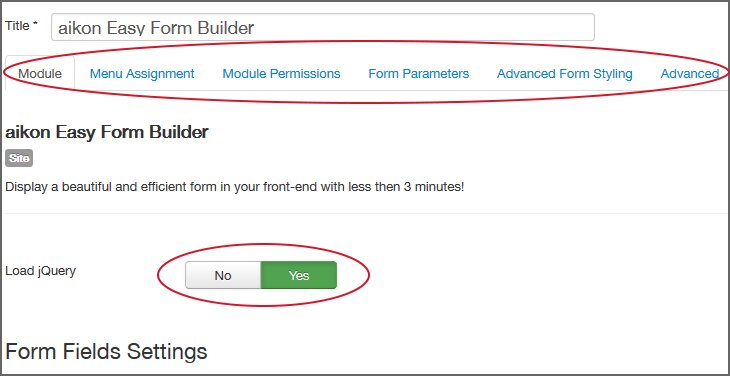
If your module still isn't working properly, we strongly recommend you follow our troubleshooting tips below.
Adding Content and Fields
Under 'Form Fields Settings' you can set the text you want for the 'Submit' button, and add HTML text before and after the form. Once you decide to add content, an editor will appear before you.
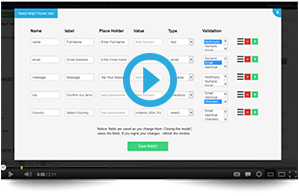
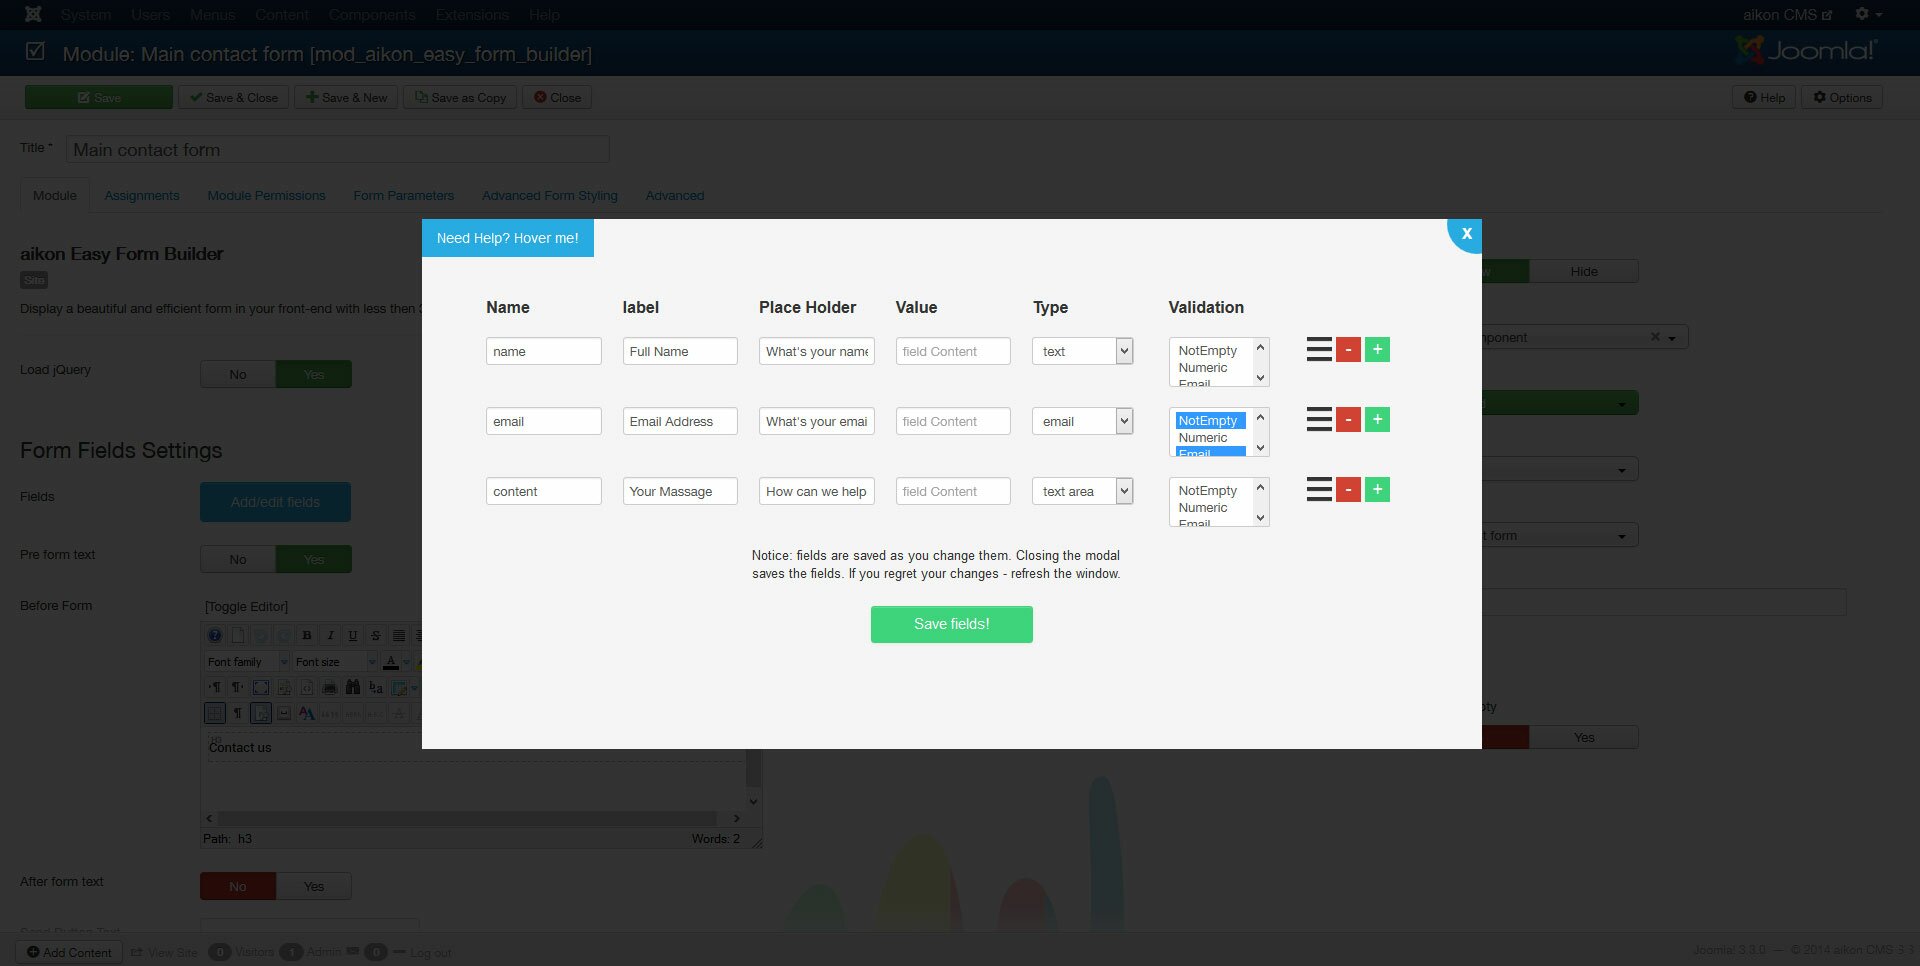
However, the most important feature here is the 'Add/Edit Fields' tab. By clicking on it a special module for adding/editing form fields will open up. Each line inside the module represents a specific field. Use the controls on the right of each line to add, remove or reorder your fields (drag and drop). On the top left you can find some quick tips and info by hovering over the button located there.
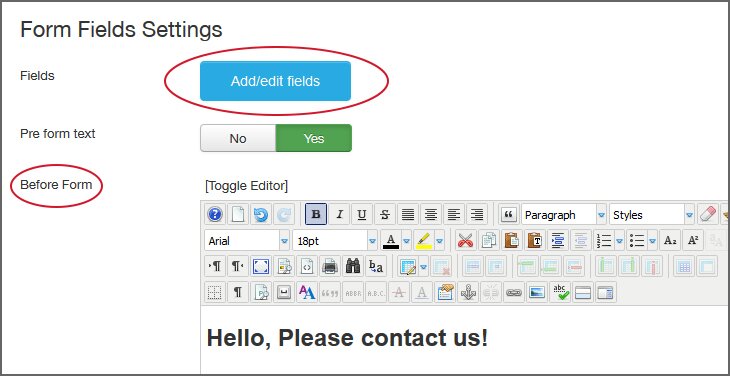
For each field you should fill in the following:
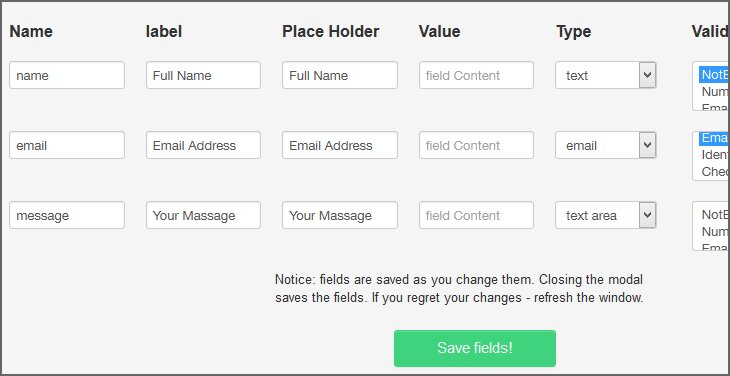
Please notice: for select and radio buttons, fill the options you want in the 'Value' field using commas (',') to separate between them.
All done? Save your fields by clicking on the 'Save' button.
Please notice: closing the module will save the changes but they will only be saved to the database and implemented in your form if you save the module itself. If you do not save the module – the changes will be discarded.
Setting Up Your Form Container and Position
This step may not be relevant for you. Under 'Basic Form Settings' you can select the maximum form width in % or PX. If you wish, you can have the entire form float on either side (or not at all) of your layout's display. You can also select the text's alignment and direction, as well as if you want a centered form or if you are implementing an RTL language.
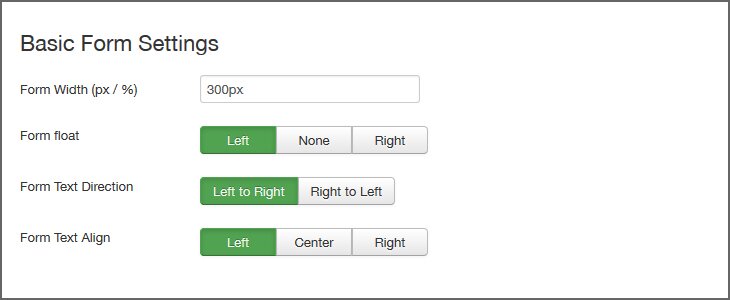
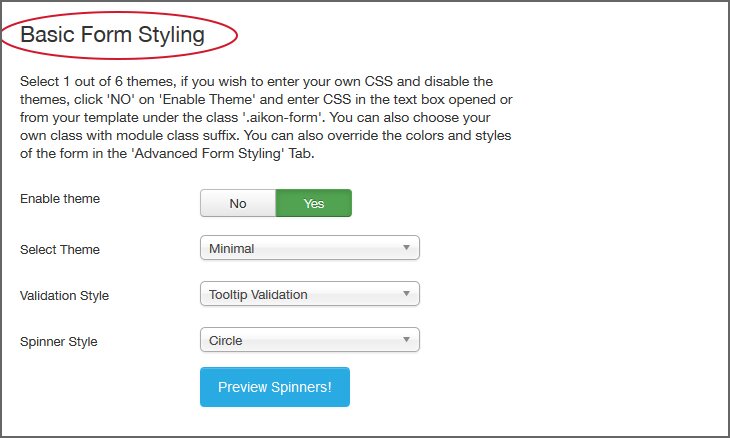
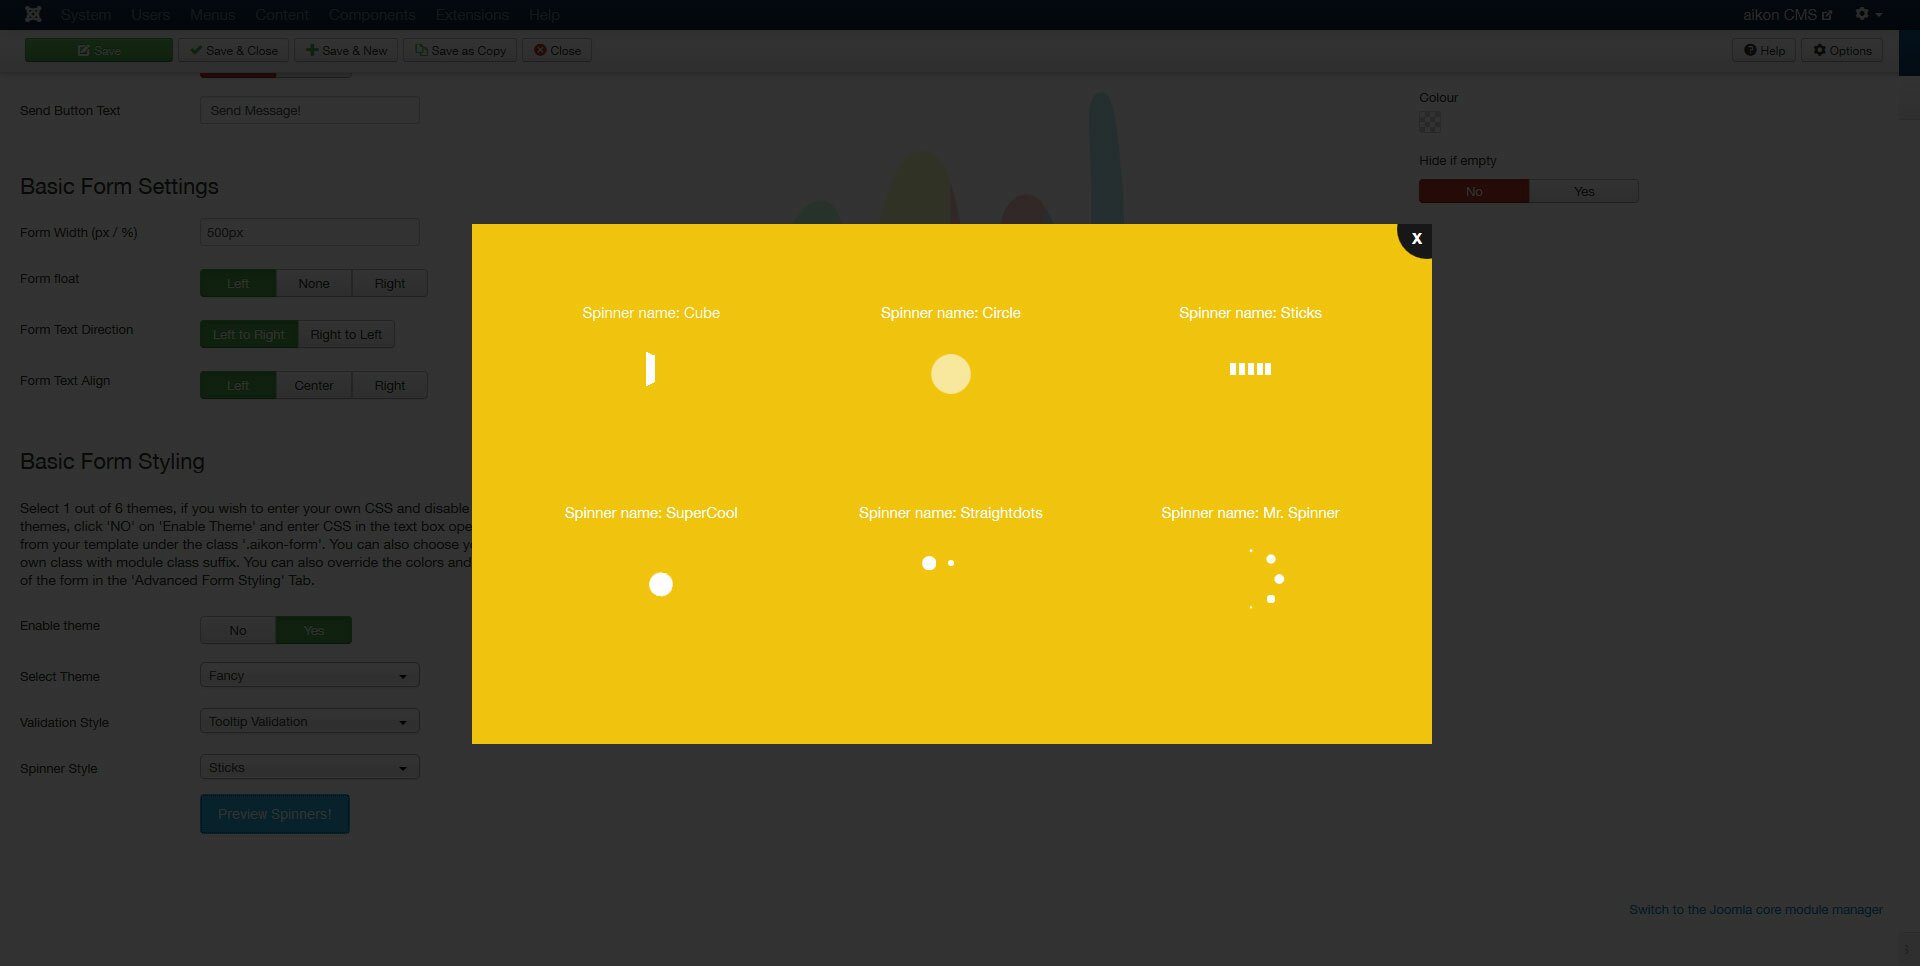
Under 'Basic Form Styling' you got your basic styling options. If you choose to 'Enable Theme', you can select one of the existing themes in the provided list. If not, you can add a custom CSS in the field which will appear before you. In addition, you can decide how the validation will behave (i.e. border color, inline text or tooltips); and choose the style of your spinner (which is displayed as the form is processing a submission). You also have a button which allows you to preview the spinners.
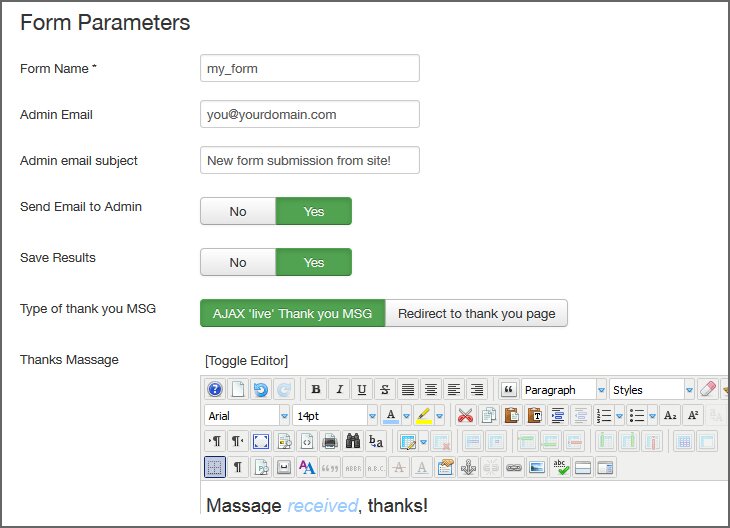
It is very important that you set these, either wise you won't be able to collect your form submission data.
Firstly, you must fill out the form's name. Use only one word that is alphanumeric (without special characters or spaces).
Next, you can enable emailing an admin upon form submission, which will also require you to fill in the email's subject, and an email address. You can input several addresses, by separating them with commas (',').
You can enable or disable 'Save the Submitted Data to the Database', for later inspection using the aikon Easy Form Builder Component.
Finally, you can decide how the form will behave in the front end: either Ajax processing or redirection. A thank you message field will appear if you are using Ajax. Use the editor to input and style a personalized thank you message. If you choose to redirect, you will get a select box where you can select a menu item from the menu items inside your website.
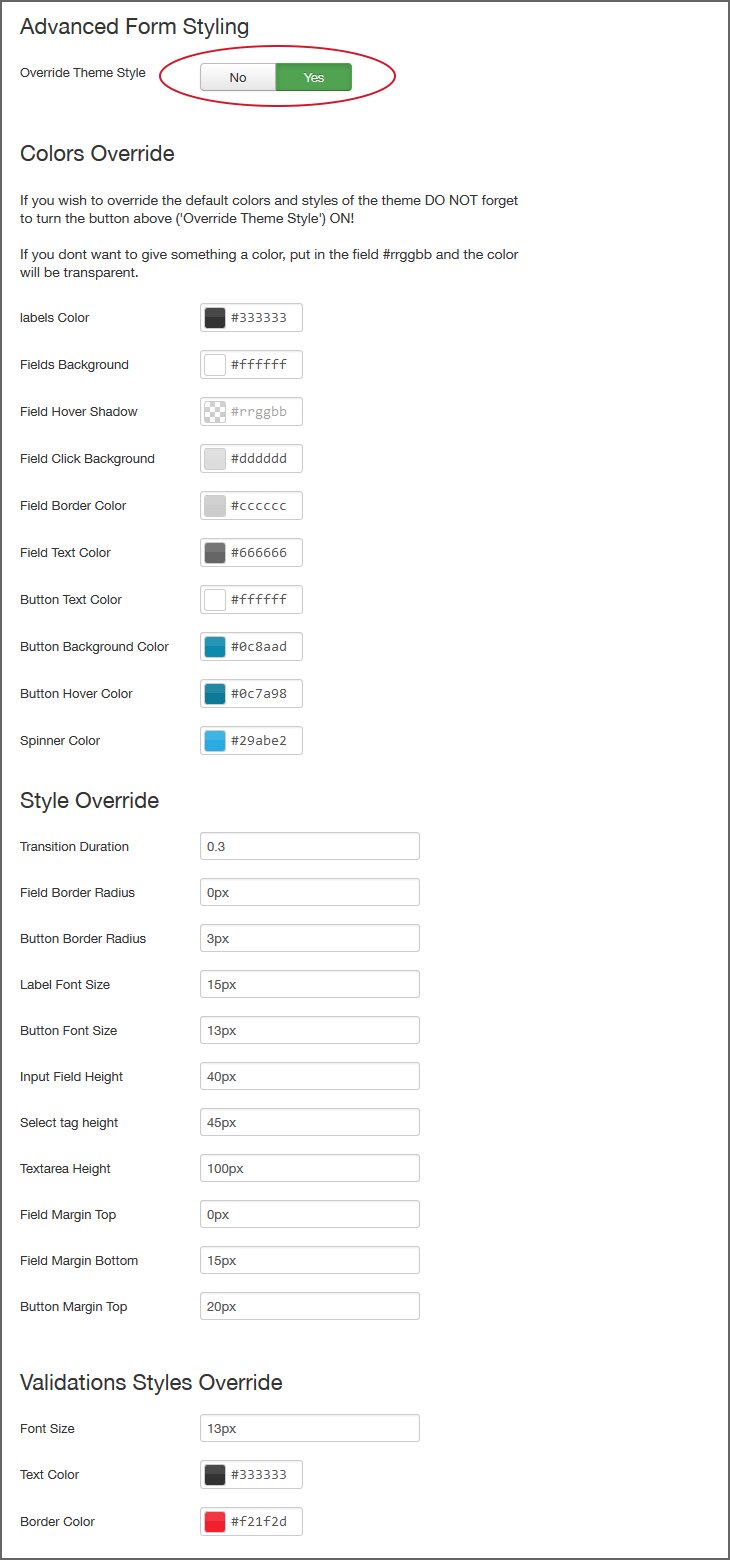
If you want to style your form in an amazingly cool way, you've come to the right place!
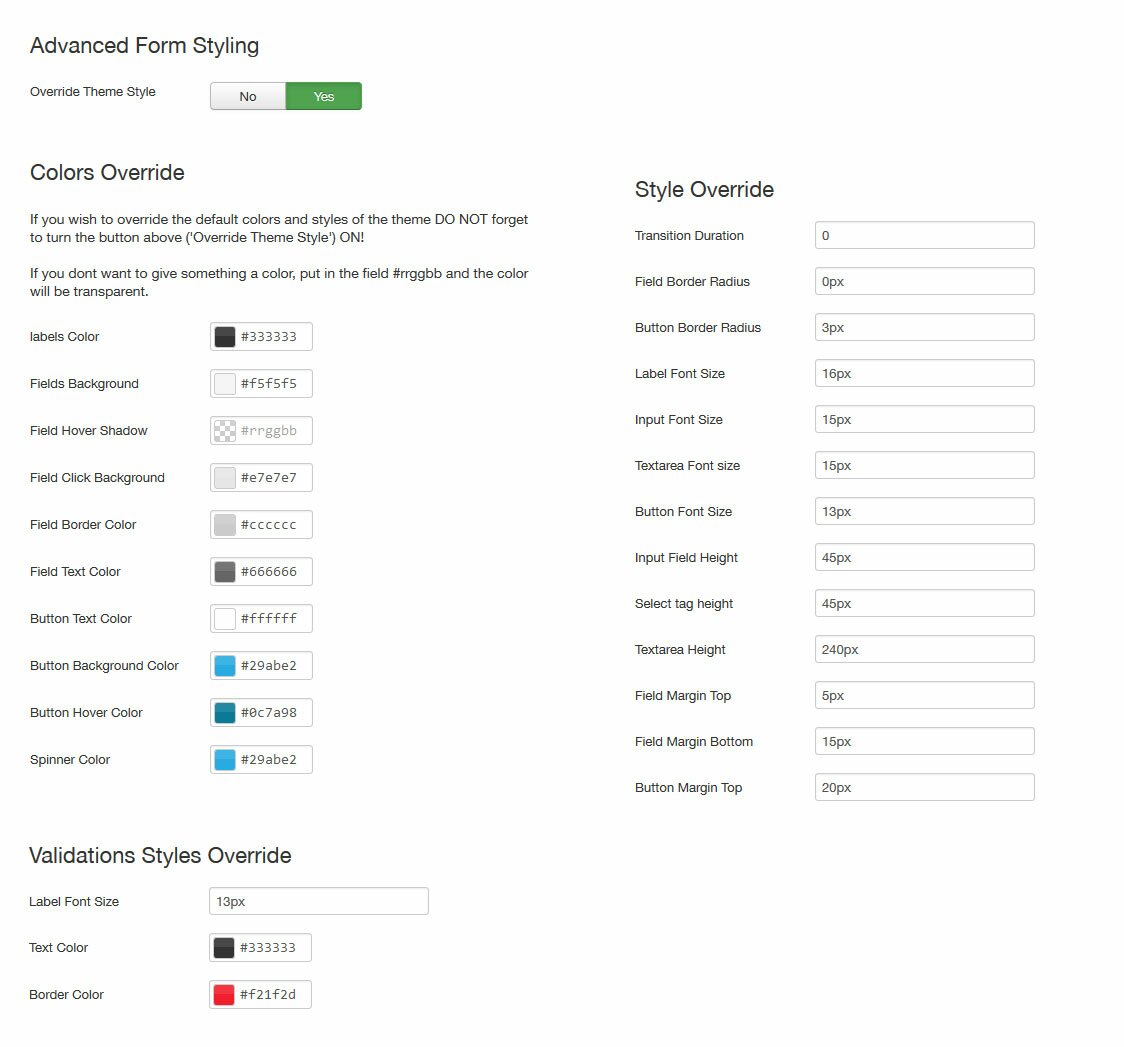
In the 'Advanced Form Styling' tab you will find everything you need.
Please notice: on the very top of the tab there is a field entitled 'Override Theme Styles'. When this is turned off, all the other fields - DO NOT - take effect. If you want to change stuff here you will need to turn that it on.
Here you will also be able to select colors using our color pickers, set values to the different CSS properties which will apply to the form, and override your selected theme. Finally, you can also style the 'Validation's font size and text color, as well as the color for the border of invalid fields.
Each field in the advanced tab has a proper title and helpful tooltip. So go ahead and enjoy – no need for any further reading here!
This may be the easiest thing you have ever done. Click the 'aikon forms' button under the 'Components' tab and you'll be right in front of the data.
You can sort the data according to date of creation or form name (that you've set in the module's 'Options' tab). Hover over the last cell of the table to see the data.
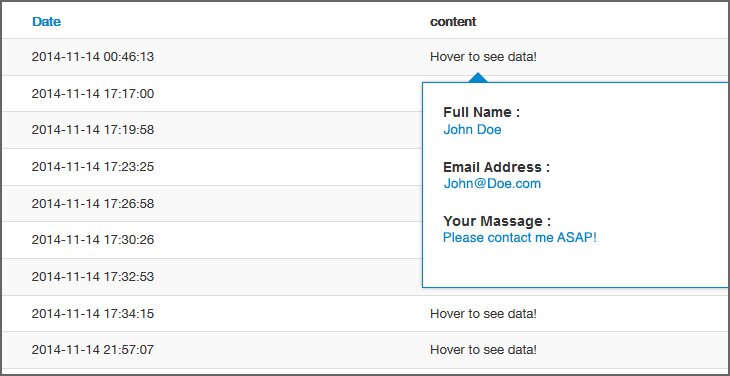
Heads up: if you're using Joomla 3, you can click the form name to see the data in addition to the hover tooltip. But, whatever you do - do NOT try to change it! The data has been encoded into the database, so you may damage it. Attempting to change the data is not supposed to be allowed by the system, but even if you know how to, we strongly recommend against it!
The module may not work for various reasons. These can all be easily resolved.
The most common reasons are improper configuration of general module information or parameters, and/or a jQuery issue.
You should therefore make sure your module's general configurations are valid and fit your intention:
Make sure the module's parameters are valid: aikon form requires correct settings. Check out the rest of the document to make sure everything has been set correctly.
Solving jQuery Issues:
Most extensions require a jQuery plugin. Many of them include added features that enable users to leverage jQuery to the fullest. The only problem is that users often upload jQuery themselves, and by doing so they overwrite the extended version of jQuery, thus preventing the extension from working properly.
The best solution is to make sure only one instance of jQuery is loaded. One way of doing that is to manually check that jQuery is NOT loaded via the form template but by Joomla! only. We also suggest you download a free plugin which can help you handle this issue. It's called jQuery Easy, and it's available here: http://extensions.joomla.org/extensions/core-enhancements/performance/jquery-scripts/18327.
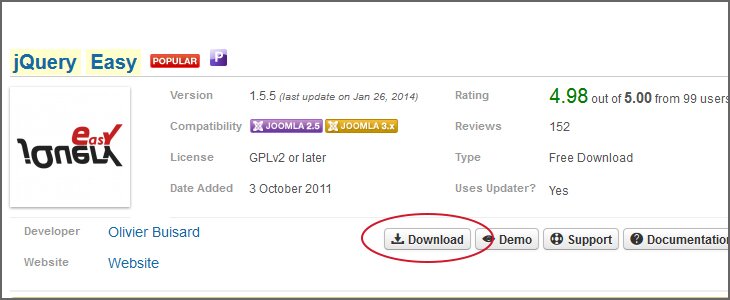
Pease notice: we are NOT responsible for any damage that may be caused by using the jQuery Easy plugin. The plugin needs to installed, enabled and configured manually.
The recommended settings for this plugin are: under the 'Basic Site Options' select 'Enable jQuery field jQuery' or 'JQuery+jQuery UI (select one of them, according to your specific needs). Under version select 1.8 and you're ready to go!














 Auto ResponsiveEasy CustomizationContacts SavingFull Design ControlAjax Live ValidationsTime Saver

 2.5 + 3.X

 2.5 + 3.X
 2.5 + 3.X

 2.5 + 3.X
Copyrights © 2014 aikon. All rights reserved. Please read our Terms of Service and Privacy Policy.
aikon CMS is not affiliated with or endorsed by Open Source Matters or the Joomla! Project and / or any other open source projects.
The Joomla! logo is used under a limited license granted by Open Source Matters, the trademark holder in the United States and other countries.

 2.5 + 3.X

